




Hey there! As a supplier of DIB Ball Valves, I often get asked about how to replace the body of a DIB Ball Valve. It's not as complicated as it might seem at first glance, but it does require some know - how and the right tools. In this blog, I'll walk you through the process step by step.
Why Replace the Body of a DIB Ball Valve?
First off, you might be wondering why you'd need to replace the body of a DIB Ball Valve in the first place. Well, there are a few reasons. Over time, the valve body can suffer from wear and tear, especially if it's exposed to harsh chemicals, high pressures, or extreme temperatures. Corrosion is also a common culprit, eating away at the metal and weakening the structure. Sometimes, there might be a manufacturing defect in the body, or you might need to upgrade the valve to meet new operational requirements.

Tools You'll Need
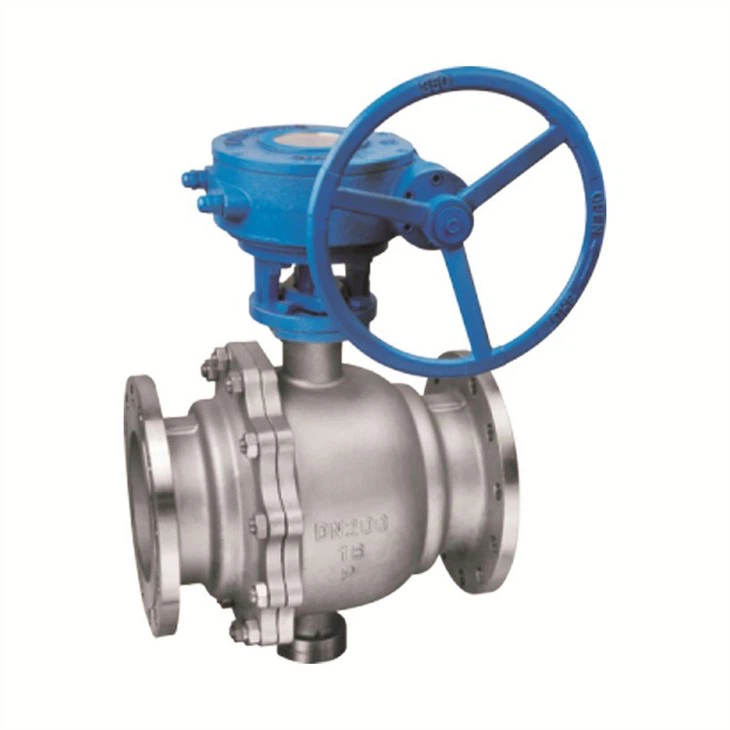
Before you start the replacement process, make sure you have the right tools on hand. You'll need a set of wrenches, both adjustable and fixed, to loosen and tighten the bolts. A torque wrench is also essential to ensure that you're tightening the bolts to the correct specifications. A pipe cutter might be necessary if you need to cut out the old valve body. Additionally, you'll need a sealant to ensure a proper seal between the new body and the other components of the valve.
Step 1: Shut Down the System
Safety first! Before you start working on the valve, you need to shut down the system. This means turning off the flow of fluid through the valve and relieving any pressure in the pipeline. You can do this by closing the upstream and downstream isolation valves. Make sure to follow all safety protocols and wear appropriate personal protective equipment, such as gloves and safety glasses.
Step 2: Remove the Old Valve Body
Once the system is shut down and depressurized, it's time to remove the old valve body. Start by using your wrenches to loosen the bolts that connect the valve body to the pipeline and the other components of the valve, like the actuator and the bonnet. Be careful not to damage the threads on the bolts. Once all the bolts are loose, carefully lift the old valve body out of the pipeline. You might need to use a pipe cutter if the valve body is welded to the pipeline.
Step 3: Inspect the Pipeline and Components
Before you install the new valve body, take a good look at the pipeline and the other components of the valve. Check for any signs of damage, such as cracks or corrosion. If you find any issues, you'll need to address them before proceeding. You might need to clean the pipeline and the mating surfaces to ensure a proper seal with the new valve body.
Step 4: Install the New Valve Body
Now it's time to install the new valve body. Carefully lower the new body into the pipeline and align it with the other components. Make sure that the holes for the bolts line up correctly. Apply a thin layer of sealant to the mating surfaces to prevent leaks. Then, insert the bolts and hand - tighten them. Once all the bolts are in place, use a torque wrench to tighten them to the manufacturer's recommended specifications.
Step 5: Reconnect the Components
After the new valve body is installed, it's time to reconnect the other components of the valve, such as the actuator and the bonnet. Follow the same process as before, using your wrenches to tighten the bolts. Make sure that all the connections are secure and that there are no gaps.
Step 6: Test the Valve
Once everything is reconnected, it's time to test the valve. Slowly open the upstream isolation valve to allow fluid to flow into the pipeline. Check for any leaks around the valve body and the connections. If you notice any leaks, you might need to tighten the bolts a little more or apply more sealant. Once you're satisfied that there are no leaks, fully open and close the valve a few times to make sure it's operating smoothly.
Related Products
If you're in the market for DIB Ball Valves or related products, we also offer DBB Ball Valve, Cast Trunnion Ball Valve, and Forged Trunnion Ball Valve. These valves are designed to meet the highest standards of quality and performance, and they're suitable for a wide range of applications.
Conclusion
Replacing the body of a DIB Ball Valve is a task that requires some time and effort, but it's definitely doable if you have the right tools and follow the steps carefully. If you have any questions or need further assistance, don't hesitate to reach out. Whether you're looking to replace a valve body or purchase a new DIB Ball Valve, we're here to help. Contact us to start a procurement discussion and find the best solution for your needs.
References
- Valve Manufacturer's Installation Manuals
- Industry Standards for Valve Installation and Maintenance