


Hey there! As a supplier of PLUG Valves, I often get asked about how to replace the sealing elements of these valves. It's a crucial maintenance task that can significantly impact the performance and longevity of your PLUG Valve. So, let's dive right in and explore the step - by - step process.
First off, let me give you a bit of background. PLUG Valves are used in a wide range of industries, from oil and gas to chemical processing. They're known for their simplicity and reliability. But like any mechanical component, the sealing elements can wear out over time due to factors like friction, corrosion, and high - pressure environments.
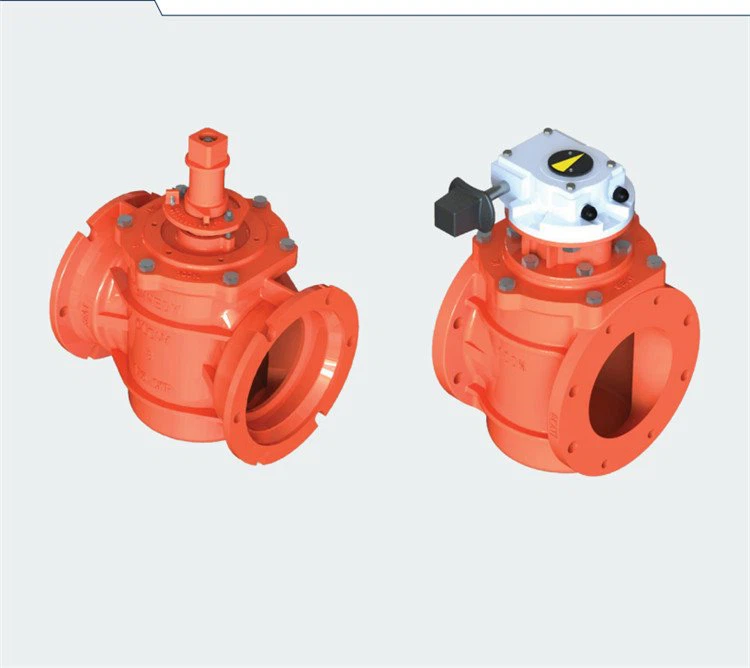

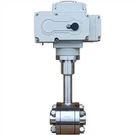
There are different types of PLUG Valves, such as the Metal To Metal Seat PLUG Valve, Eccentricl PLUG Valve, and API PLUG Valve. Each type might have slightly different sealing element designs, but the general replacement process remains quite similar.
Step 1: Preparation
Before you start replacing the sealing elements, you need to make sure you've got all the necessary tools and parts. You'll typically need a set of wrenches, a screwdriver, a sealant (if required), and of course, the new sealing elements. It's also important to have a clean work area to prevent any dirt or debris from getting into the valve.
Shut off the flow of the fluid through the valve. This is a safety measure to avoid any leaks or accidents during the replacement process. You can do this by closing the upstream and downstream isolation valves.
Step 2: Valve Disassembly
Once you've prepared everything, it's time to start disassembling the valve. Begin by removing the valve bonnet. This is usually held in place by bolts or screws. Use your wrenches or screwdriver to carefully loosen and remove these fasteners. Make sure to keep track of all the parts and fasteners as you remove them.
After removing the bonnet, you'll be able to access the plug and the sealing elements. Take a good look at the existing sealing elements to understand their configuration. Note down any signs of damage, such as cracks, abrasions, or excessive wear. This information can be useful when selecting the new sealing elements.
Step 3: Removing the Old Sealing Elements
Now, it's time to remove the old sealing elements. Depending on the design of the valve, the sealing elements might be held in place by clips, adhesives, or simply by compression. If they're held by clips, use your screwdriver or a pair of pliers to carefully remove the clips.
If there's an adhesive, you might need to use a solvent to dissolve it. Be careful when using solvents, as some can be harmful to the valve materials. Make sure to follow the manufacturer's instructions.
Gently pry out the old sealing elements using a flat - head screwdriver or a similar tool. Take your time to avoid damaging the valve body or the plug.
Step 4: Cleaning the Valve
Once the old sealing elements are removed, it's essential to clean the valve thoroughly. Use a clean cloth and a suitable cleaning agent to remove any dirt, debris, or old sealant from the valve body and the plug. Pay special attention to the areas where the new sealing elements will be installed.
Make sure there are no rough edges or burrs on the valve surfaces. If you find any, use a fine - grit sandpaper to smooth them out. A clean and smooth surface is crucial for a proper seal.
Step 5: Installing the New Sealing Elements
Now comes the exciting part - installing the new sealing elements. Start by applying a thin layer of sealant to the sealing surfaces if required. This can help improve the seal and prevent leaks.
Carefully place the new sealing elements in their respective positions. Make sure they fit snugly and are properly aligned. If the sealing elements have a specific orientation, follow the manufacturer's instructions to ensure correct installation.
Use your fingers or a soft - tipped tool to gently press the sealing elements into place. Make sure they're seated evenly and there are no gaps or wrinkles.
Step 6: Reassembling the Valve
After installing the new sealing elements, it's time to reassemble the valve. Place the plug back into the valve body, making sure it rotates smoothly. Then, carefully position the bonnet on top of the valve body and align the bolt holes.
Insert the bolts or screws and tighten them gradually and evenly. Avoid over - tightening, as this can damage the sealing elements or the valve components. Use a torque wrench if possible to ensure the correct tightening torque.
Step 7: Testing the Valve
Once the valve is reassembled, it's important to test it to make sure everything is working correctly. Slowly open the upstream isolation valve and allow the fluid to flow into the valve. Check for any leaks around the valve bonnet, the sealing elements, or any other joints.
If you notice any leaks, shut off the flow immediately and recheck the installation of the sealing elements. It might be necessary to disassemble the valve again and make the necessary adjustments.
If the valve passes the leak test, gradually open the downstream isolation valve and check the valve's operation. Make sure the valve can open and close smoothly and that it provides a proper shut - off.
Tips and Tricks
- Always refer to the valve manufacturer's manual for specific instructions. Different valve models might have unique features or requirements.
- When selecting new sealing elements, make sure they're compatible with the fluid being handled by the valve. For example, if the valve is used in a chemical process, the sealing elements need to be resistant to the chemicals.
- Keep a spare set of sealing elements on hand. This can save you time and money in case of unexpected failures.
Conclusion
Replacing the sealing elements of a PLUG Valve is a task that requires attention to detail and a bit of mechanical know - how. But by following these steps, you can ensure that your valve continues to operate efficiently and reliably.
If you're looking for high - quality PLUG Valves or replacement sealing elements, we're here to help. As a leading PLUG Valve supplier, we offer a wide range of valves and components to meet your needs. Whether you need a Metal To Metal Seat PLUG Valve, an Eccentricl PLUG Valve, or an API PLUG Valve, we've got you covered.
If you have any questions or want to discuss your specific requirements, don't hesitate to reach out. We're always happy to assist you with your valve - related needs.
References
- Valve Manufacturer's Manuals
- Industry Standards for Valve Maintenance and Repair